First steps with Scienfy
1. Launch Scienfy
How can you start creating on Scienfy? You have two options: the Free version and the Full version. Both have the same design and editing options. However, the Free version will not allow you to save your designs or remove the watermark. Therefore, if what you need is a layout with publishing rights, it is better to access the Full version. BE CAREFUL! In the Free version you cannot save designs for later. You can download them immediately or they will be deleted. The Full version is only available under subscription. You will need to log in to access it.

The first step to start designing is to launch the Scienfy app. In the 'Free version' just select the 'Launch trial version' button. In the 'Full version' (available under subscription), you need to select the 'Customize this design' button. Be patient! It may take a few seconds to appear.

2. Interface basics
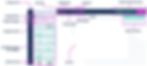
Here is the Scienfy app. Let's discover its options.
2.1. Canvas settings
Resize canvas
First we recommend that you define the size of your canvas. To do this, simply type the dimensions in centimetres (cm) in the 'Set dimensions' menu. If you need to set the height-to-width ratio, slide the central button.

Customize the background
If you click on the canvas a red border will appear, which means that it is selected. In addition, new options for adjusting the background design will appear. TIP: If you select the 'Remove background' option it becomes transparent. This is useful if you want to make compositions to download in PNG 'without background'.

Change background color
If you select the 'Change colour' option the side menu will change. Some default colours appear here, but you can add more colours by pressing the '+' button (Add new colours).

2.2. Adding and customising images
Find images
You can find the image you need by searching for keywords in the Browser or by browsing the available libraries.

Upload your images
You can also add your own images to integrate them into the design. For example, you can use protein images from the PDB website, or attach your own data graphs.

Insert the selected images
Including images is very simple. Just click on the image of your choice and it will be placed in the centre of the Canvas.
Customize images
When you have selected an image in your Canvas, new customization options appear.

-
Edit picture. This tool allows you to apply filters to the image or edit its properties.

In the other tab of the 'Edit picture' menu you will find the basic settings for the pictures.

TIP: Use the 'Tint' tool to adjust the colour of the images. You may find it useful to change to the colour you like best.

TIP: Use the 'Blur' tool and resize images to generate a depth effect in the image.

-
Remove blackground. Scienfy images have no background, but it can be useful to remove the background from your uploaded photos.
-
Apply as background image. You can place images in the background, but these will not be editable once set.
-
Crop photo. This tool is used to crop the image.
-
Cut item. The classic tool for cutting an item and then pasting it somewhere else.
-
Delete item. To quickly delete the selected item, but you can also shortcut with the 'Supr' key.
-
Copy item. To copy the selected item, but you can also shortcut with 'Ctrl+C'.
-
Copy styles. If you have edited a photo with a lot of effort and want to make the same changes to other figures, you can use this tool to copy the styles and paste them into the other one.
-
Align. Grids can be useful for positioning figures, but this tool allows you to align them perfectly.
-
Layer. This option allows you to change the order of the layers (or images). It can be very useful for placing one figure on top of another.

-
Transparency. This tool will help you to change the opacity of your figures.
-
Transform. The transform tool allows you to rotate, scale on the X and Y axis, and flip vertically and horizontally.
2.3. Adding and customising text
Add text boxs
Adding text boxes is easy. Just is needed to click the 'T' button and a new text box will appear in your Canvas.

Customize text boxs
New features appear when selecting a text box. Including bold, italic, underlined, text alignment, text size, and a tool for modify the geometry of the text box (for example, curving words). In '···' button, you can also change the letter and line spacing.

Select your favourite typography
The default font is 'Arial'. However, you can access thousands of different fonts available on Google Fonts. Once you have selected your preferred font, it will appear in the font options and you will be able to use it. TIP: You can select more than one typeface and they will all be added to Scienfy at once! There are no download limits!

2.4. Drawing on canvas
Insert shapes
Clicking on the 'Draw on Canvas' option brings up new options in Scienfy. It is possible to create free strokes, lines, squares, and circles. If you want to make a composite figure, for example a line and a circle to simulate microscopic magnification, you can group the items to work with them together.

Colorize shapes
You can choose the colour you want for your shapes.

3. Save & Export options
Saving and exporting options can be found in the top right section.

Download
You can export and download your compositions in PDF, PNG, or JPG. If you need any additional formats, please contact info@scienfy.eu.

Save for later
You can save compositions for further editing later. You can find the designs you save under 'Designs & Permissions' on your personal Scienfy page.

